How to Create a Website with Hostinger Website Builder: A Step-by-Step Guide
How to Create a Website with Hostinger Website Builder: A Step-by-Step Guide
Published on: October 10, 2024
Tags: Advance Web Development, Custom Web Development, Digital Trends, website development services, Wordpress
Creating a professional website is easier than ever with Hostinger’s website builder. Whether you’re a beginner or experienced, you can build a sleek, functional site without coding skills. In this guide, we’ll walk you through the entire process of creating your website using the Hostinger Website Builder. By the end, you’ll have a beautiful website ready to go live!
Why Choose Hostinger Website Builder?
Hostinger’s website builder offers a variety of features that make website creation a breeze. It’s beginner-friendly, yet packed with customization options for those who want more control. Here are some key features:
- Drag-and-Drop Interface: No coding required.
- SEO-Friendly Templates: Get a head start with built-in SEO tools.
- Mobile Responsiveness: Websites automatically adjust to different screen sizes.
- Fast Hosting: Hostinger provides fast, reliable hosting to keep your site running smoothly.

Step 1: Sign Up for a Hostinger Account
The first step in building your website is to create an account on Hostinger.
- Visit Hostinger.com and select the Website Builder plan that best suits your needs.
- Create an account by providing your email address and choosing a strong password.
- Complete the payment process to finalise your subscription.
Step 2: Choose a Domain Name
Every website needs a unique domain name. If you don’t already have one, Hostinger offers free domain registration with most of its plans.
- Tip: Choose a domain name that is easy to remember, reflects your brand, and includes relevant keywords for SEO purposes.
Once you’ve selected your domain, register it through Hostinger’s domain management tool.
Step 3: Launch the Website Builder
After setting up your account and domain, it’s time to launch the website builder.
- Log in to your Hostinger dashboard.
- Navigate to the Website Builder section and click Start Building.
- You’ll be prompted to select a template for your website. Browse through the various categories, from business to personal portfolios, and choose one that fits your vision.
Step 4: Customise Your Template
Now that you’ve selected a template, it’s time to personalise it. Hostinger’s drag-and-drop builder makes customisation easy.
- Header: Start with your website’s header. Add your logo and adjust the menu bar.
- Sections: Customise different sections of your page by clicking and dragging elements like text, images, and buttons. For example:
- Homepage Introduction: Write a short introduction about your brand.About Us Section: Share your story or business goals.Service/Product Descriptions: Add engaging descriptions for the services or products you offer.
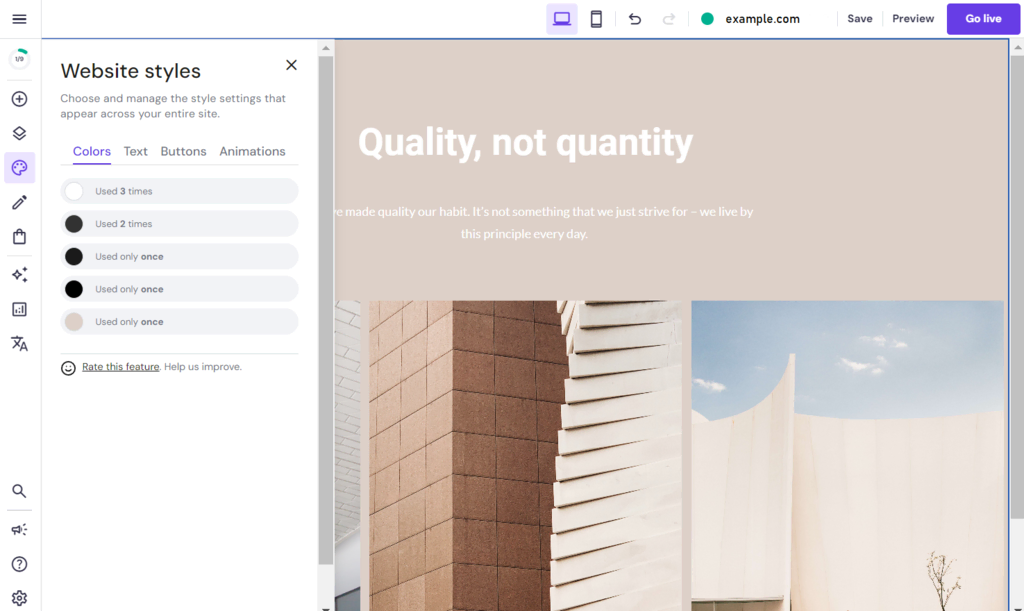
- Fonts and Colours: Choose fonts and colours that align with your brand identity. Keep consistency across all pages to create a professional look.
Step 5: Add Images and Visual Elements
Visual content is a key part of website design. Ensure that your website is engaging by adding high-quality images. You can upload your own images or use free stock photos available in the builder.
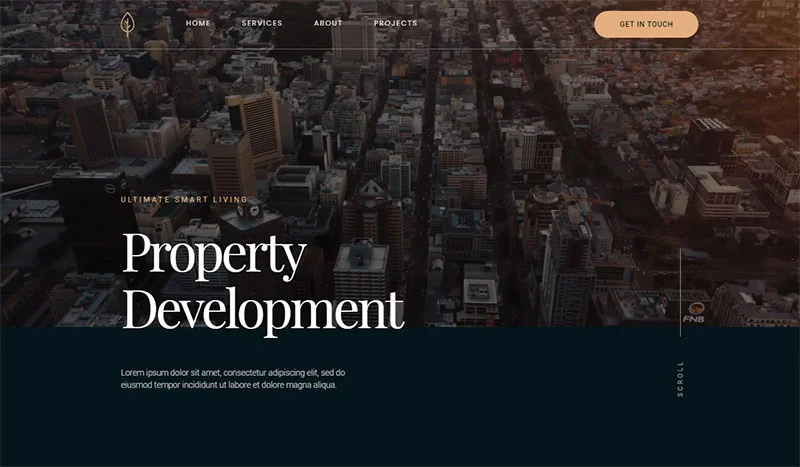
- Hero Image: Choose an eye-catching image for the top section of your homepage. Note: Add an image example of a hero section here
- Gallery: If applicable, include a gallery section showcasing your work, products, or services. Be sure to optimise images for web use to keep your site fast. Tip: Always include alt text for images, which helps with SEO by describing the content of the image for search engines.
Step 6: Optimise Your Website for SEO
Search engine optimisation (SEO) is essential to ensure your website ranks well on Google and other search engines. Here’s how you can optimise your website using Hostinger’s built-in SEO tools:
- Meta Descriptions: Add unique meta descriptions to each page. These descriptions should include your target keywords and provide a summary of what each page is about.
- Headings (H1, H2, H3): Use headings strategically. Your main page title should be an H1, while subheadings can be H2 or H3.
- SEO-Friendly URLs: Ensure your page URLs are clean and include relevant keywords.
- Mobile Optimisation: Test your website on mobile devices. Since Google prioritises mobile-friendly websites, ensure everything looks great on smaller screens. Note: Add an image showing mobile optimisation and SEO tools on the Hostinger dashboard here
Step 7: Add Essential Pages
Make sure your website includes these essential pages:
- Home: Introduce your business, product, or brand with a clear value proposition.
- About: Tell visitors who you are and what your mission is.
- Services/Products: Provide detailed information on what you offer.
- Contact: Make it easy for visitors to get in touch by adding a contact form and social media links.
- Blog (Optional): Add a blog to share updates, industry insights, and engage with your audience. Blogs are great for SEO as they allow you to add fresh content regularly. Note: Insert an image showcasing an example of a well-designed blog section here
Step 8: Preview and Publish Your Website
Before going live, preview your website to check how it looks on both desktop and mobile devices.
- Click the Preview button in the builder to see your website in action.
- Test all links, buttons, and forms to ensure they are working correctly.
Once satisfied, click Publish to make your website live. Hostinger will automatically deploy it to the web using the domain you registered.
Step 9: Monitor and Improve
Congratulations! Your website is live. However, the work doesn’t stop there. Use Hostinger’s analytics tools to monitor traffic, understand user behaviour, and continually make improvements. You can also integrate Google Analytics for more detailed insights.
Regularly updating your website with fresh content and ensuring it is optimised for speed and performance will help boost your SEO rankings over time.
Final Thoughts
Building a website with Hostinger Website Builder is an intuitive process that allows you to create a professional site without any coding knowledge. Follow these steps, add your personal touch, and you’ll have a stunning website that’s SEO-friendly and ready to impress your visitors. The best feature is its Ai and NodeJS compatibility. Features are easy to use, and you can simply fall in love with this hosting. Prices are very affordable.
Bonus Tip: Consistently adding fresh, relevant content such as blog posts or updates to your service pages can improve your website’s SEO and keep your audience engaged.
Related Categories: Artification Intelligence (AI), CSS, hosting Solutions, Javascript, news, nodejs, React, SEO, Social, step-by-step guides, Uncategorized, Web Development, Webflow, wordpress